Thursday, February 10, 2011

Spring 2011.Week 2. Figure Studies

Had my first two classes with figure models this week. This is not my first ever, in fact I think it is my 3rd figure modeling class. I love anatomical studies and figure drawing.

Quick 1 minute poses

More 1 minute poses

5 minute pose

5 minute pose

20 minute sculpture 


30 minute sculpture


Spring2011. Casting. Cuttlebone Casting


Today we did cuttlebone casting. It was a fun experience though mine unfortunately did not make it. I want to thank Rachel for her time and expertise in helping us pour our metal though!


Spring 2011.Week 1.Sketches

I think my focus for my wax studies project is somewhere between a study of anatomy and an obsession with decay and death. I don't know if the analysis of death reads in my sketches so far, but I don't know how totally important that is to the series. After work tomorrow I am going to crank a bunch of sketches out and sculpt a few of them. I feel like I know where I am going, but I am not quite there yet.


Friday, February 4, 2011

Spring 2011.Week 1. Anatomical Studies and the Analysis of Death

For casting, we have a project I have already mentioned briefly to take an asymmetrical and a symmetrical object and take them from a skeletal state to a skinned state. This means having a mesh like outside to a fully rendered image. I keep thinking of this like it is a 3D model and you are looking at it in wireframe, ghosted, rough rendered, fully rendered in its four states. When I started to think about it, I started to think about the human body. I originally in my head was thinking about how we have skeletons all the way to skin, but I then thought thats way too literal. So, I then started to think about when we die, the only thing that ends up of use is our skeleton and from there I started to think about how over time if left exposed even the skeleton will begin to wear away over hundreds or thousands of years.


I started to think about what things look like when they wear away, like the pocketed surface of things and I took some pictures of cracked rocks and surfaces I could find and I am taking a lot of surface texturing ideas from them. (On a side note, there are about 100 of these and I will be uploading them to my Flickr tonight).  I started to draw out distinctive looking bones and figures and I think what I want to do from here is to take these textures and begin to apply them over the surface of the bones to show how over time nature breaks down them. So far I am working on the 'SKIN' end of the spectrum with the full bone intact.

I am going to keep working on them throughout this weekend so just check back. Also, the rest of the texture samples can be found here.  Enjoy <3

Thursday, February 3, 2011

Sping 2011.Week 1.Blender Work

Just my experiments with blender. I honestly am pretty slow right now because I am still trying to learn all the tools but after about 2 hours of work I made it to here:

I am actually loving Blender a lot. it has a lot more functionality for this kind of thing that I have found in other programs and the interface is rather easy.

I am going to take the clay version and see if I can cast it in plaster and it would be totally awesome to make a mold and a wax and cast it in bronze then compare. Either way, I am going to keep up the work and see where this takes me.

Week 1.Updates to the Updates.Casting/RP/Figure

Everything is really coming together this semester! I picked just the right classes and I really think that all of them are going to connect together in an awesome way.

Casting-
Going a new direction in my Skeleton/Skin project so that plasticine model I made of the little man I guess no longer applies, but he got me to thinking about it and I want to use him in my independent study. I really think it would be cool to take a design (like him) and transfer it into different materials but more on that in a minute. I think for casting I want to work with the human form and like warp and rotate it as it goes and to a symmetrically balanced pose and an assymetrical post and go from the skeletal lines of an early drawing and build it up with different textures and layers. I was thinking it could be like a sitting figure or something. I will get my anatomy books and work on some possible poses then break out the sculpey.

RP Study-
Okay really excited and I have a few things I am working on. I want to take the little clay face and put him into blender and model him. I took some photos as reference and I going to start to get to work. I also would love to take him and cast him in plaster and maybe using some type of injection molding turn him into a wax model I could cast. I think it would be really cool to see all the tool marks and things from making him by hand and then seeing it done in 3D modelling. I also think it would be really neat if I could have the plaster or bronze version then laser scanned and 3D printed to show all the different things you can do in the design world with traditional sculptural techniques meeting 3D techniques. I also would think it would be really cool to see how it can be scaled up and down in the computer to become any size.

Figure-
This class its just starting but I think it is going to be really cool. He said there is an opportunity to do wax casting and the professor is crazy into 3D modelling as well. I think this class has a lot of prospect.

Okay, sorry for the text blog today. All the pictures and things will be up shortly. I am working off an old desktop at the moment until I can get my Macbook Pro, so I have yet to set up the camera or anything to be able to put pictures up.

Wednesday, February 2, 2011

Google Art Project

 For all of you that haven't heard of Google Art Project, I highly recommend a visit. It is a digital collection of the art works in many major museums including MoMA, the Met, and the Van Gogh Museum. It is the largest project of it's time and brings museums all over the world to your finger tips allowing you to zoom to amazing detail. Also, I have a feeling with the introduction of web 2.0 craft and sculptural peices will be done in 3D using laser scanning technologies.

Tuesday, February 1, 2011

Spring 2011.Week 1.Updates

The spring semester is upon us, and I couldn't be more excited. I have a wonderful class line-up this semester and I think I can make big things happen.

Casting-
Last class we went over the introductory stuff really, I can't wait to get my hands into this! Next class we will be working on cuttlefish bone molds. I did some research on them and they seem to be pretty interesting. Apparently they originated in the Mediteranian somewhere in the 1st or 2nd century and was perfected in the 6th and 7th century. From there, it appears that this technigue was found all over Europe going as far as Germany where some 4th century belt buckles were found that showed distinct signs of cuttlebone mold markings. The cuttlebone itself is the hard bone found in the head area of the Cuttlefish which is a type of squid and apparently a delicacy in Italy (especially their ink which is used as a type of sauce for pasta!). The cuttlebone technique is one of the simpliest casting techniques out there and I am excited to try it out next class.


We also got a project, that was posted on the blackboard site, we haven't gone over it yet but, I have read it over and I am doing some preliminary thinking. It is to created a series of wax models, one symmetrical one asymmetrical, that go from the skeleton to the skin of the model. I instantly thought of buildings, animals, plants, organs, and finally settled on some of Da Vinci's really cool "grotesques" and anatomical facial studies. I figured those are very symmetrical (the face) and easy to research from the skeleton (literally) to the skin. For the skin I was thinking it didnt have to stop with the actual skin but it could go as far as clothing ect. I started just to make some really simple clay models and I made this little guy. He has a face only a Momma could love, but I adore him.

Rapid Prototyping-
I did some small prototypes to test sample work and sent them off to CloudRP on monday and I should get them back pretty soon so I can decide which sample I like best to order all of the materials in. I also have been working on my Research Grant Proposal all week. There are a lot of books on rapid prototyping, but most of them are very scientific. There are not many "design" related books on rapid prototyping, so it is hard to show that I'm "knowledgable" on the research that is out there. Don't get me wrong, I have spent all winter looking at books, but everything I have found is just limited.  I will keep working on it throughout the week and hopefully something comes to me. I would really like to get the funding for the test samples for the studio. I think that would really benefit everyone.

Friday, December 10, 2010

Jewelry Produce


Thank you to everyone who visited the opening of Jewelry Produce at Towson Commons today!
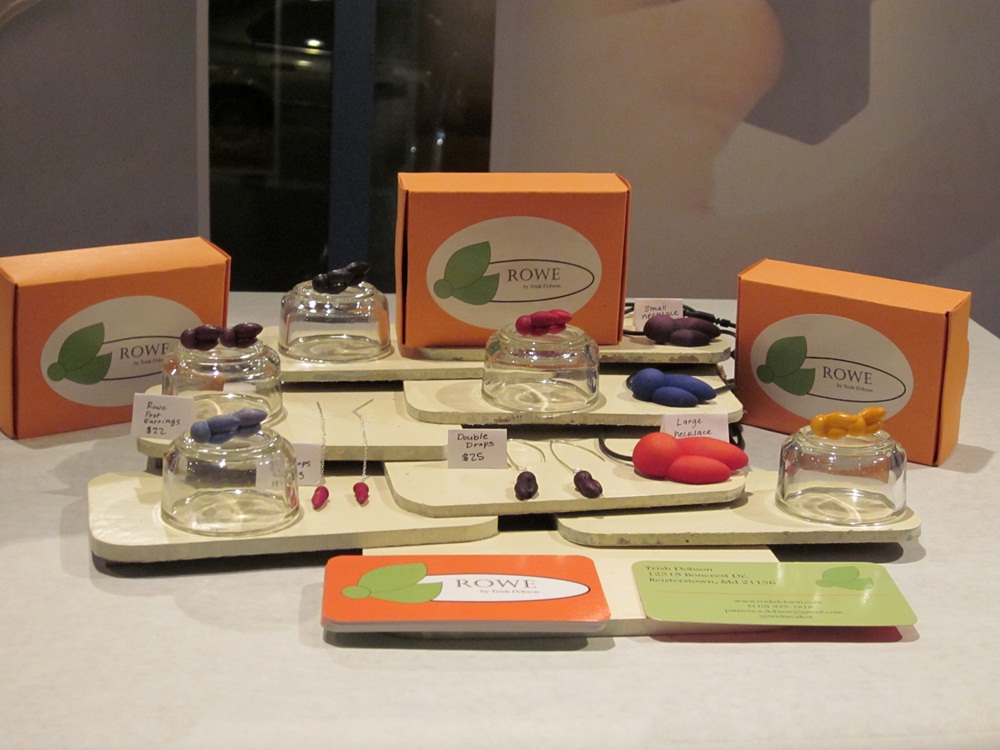
 If something you liked but wanted a different color or style please visit www.etsy.com/shops/trishdobsondesigns. We are also open tomorrow from 4pm to 7pm! Great chance to get handcrafted holiday gifts! Also, keep checking back, Rowe will release its new line of movement jewelry in early January.


Sunday, November 28, 2010

Rapid Prototyping...you are so cool!

Let me take a minute to share what I have been up to the past two weeks and the reason I have not blogged. I have been totally consumed with my new arrivals: "white, strong and flexible" rapid prototypes from Shapeways (www.shapeways.com, Check it out if you haven't yet, it is amazing).

For anyone who has used Shapeways before, you all know this feeling well, but for those that have not that read my blog, there is an amazing feeling when you see the little white and blue box arrive on your doorstep. It is a truly child-like euphoria as you tear away the tape and dig through the small sea of shipping peanuts to fish out your little bag of wonder. Then its on to inspect! Did the tests work? Does the lid fit snug? Is the indentations deep enough? All of those measurements and visualizing you did on the computer sitting in the palm of your hand.   The feeling you get when everything went right and you hold in your hand a little piece of magic. But, I'm getting off topic.

Recently, I have been working on a line of jewelry as I stated above, and in this line I have been trying to test ways of hand finishing the models to give them some color and life. I think I have finally achieved that step in my line called "Rowe" based off an old family name. Rowe is a colorful fun approach to adornment that utilizes the latest in 3D rapid prototyping technology and the simplest of natural forms.

But enough of the talking for now! I think it is much cooler just to show the pictures of what has been going on!


White Strong and Flexible/SLS Print, Blue Acid Dye, gauche, resin


SLS Print, Scarlet Acid Dye, watercolor, resin, laquer
Model Shot <3

 Just a teaser,  a lot more being finished this week!

And, it would not be complete without a video of my new little container. It has a lovely little hinge, but what I love the most is the satisfying little pop it gives with its tension fit lid.

**video coming very soon **


Thursday, November 11, 2010

Week 12 - Recap.

First off, 100th blog post! Continuing on....

This week I got  a lot accomplished. I feel as though I am on track for the rest of the semester FINALLY!

Design and Production:
My final prototype models came in, and they were prefect. Very few changes were made and the final versions were sent out today. They will arrive next week for final assembly. I ordered the boxes, stickers, and business cards. That means I just have to design and send out the earring cards and care cards. They can probably be done right before Thanksgiving with any luck once I see the exact size of the boxes. I was happy I could even find boxes in orange and I think with my stickers it will be really nice.

Jewelry 3-
Moving right along with the injection molding. It has picked up the pace a bit and I have probably 1/3 of the pieces molded. I hope to have the rest finished by early next week so I can finish them all and dye them all before the end of the week giving me about a week to assemble them for the critique. Also, the 3D models came in that I want to integrate. They are small which I don't know if I will like the feel of them onces I see them on the piece. Originally, I was going to cast the large one in the epoxy. I think that might still be the plan, but, I will have to see with time restraints if that is still possible. I also sent out the hinged version of this model out so, I should be receiving it shortly.

As a side project, I also created a double-scale ring with moving ball bearings and floating rings that are capped off with a ball. It worked perfectly. I want to scale it down and send it out with a few other models I made with ball bearings and moving elements. They are all tests for something larger I have cooked up for over break. 
And a group shot of everything that came in this week. 


Tuesday, November 9, 2010

Week 12 - Design and Production and Jewelry 3 - Progress Check

Okay, So it's been a little bit since I got to blog, but I have been working.
Let's start with Design and Production:

My models arrived...well part one of them the rest of them will be here tomorrow and Thursday. I am really excited to see my rings arrive.

Without more ranting here they are:

 They came out pretty prefect. I am currently working on finishing them. I have tried flocking them in a red, it looks pretty nice on the earrings bases. I have also tried coloring them with a thick water color and then sealing them. I have to say of the two, I love the painted versions. They can be virtually any color and are simple to produce. I am going to work on coating them in thin colored resin next. It is a bit better for wearable rings. I don't know if the painting could hold up on the rings long enough. I am going to place earring backs on the earrings tonight so I can paint them tomorrow. 

Jewelry 3:
Working on making some injection molds. I want to work on finishing solutions tomorrow because the injection material isn't the most gorgeous looking thing in the world. Anyway, I spent today figuring out what material to go with and I think I am going to work with the medium. It is harder to inject, but I like the sound it makes when it is hit together and I feel as you walk with it on it would make that noise and I also like the coloring a bit better then the others.


Can't blog much more, pretty excited and I am about to mix up a batch of resins for my earrings and to work with injection pieces. 

Wednesday, November 3, 2010

Week 11 - Jewelry 3 and Design and Production - Updates

Right now I am currently in the middle of EVERYTHING. It is kind funny how quickly things are coming together. Tomorrow I will be finishing up my mold for my next piece done in injection molding. This is a compiled mass of forms that comes together and contains you and consumes you. It is a reaction to my first project in J3. I will try to get some pictures of the mold tomorrow and see how it came out. I think it is gonna be pretty neat.

For Design and Production, we have a critique tomorrow. I am going to show my wax models and some of the 3D prints I have. A few of them got delayed due to modelling problems but, I am not freaking out yet. Everything should be coming very soon, I have 3 orders in production right now. I also have my epoxy resins coming in and I hope to be able to experiment with them this weekend or early next week.

So, not much to show today but, I hope to have a long post this weekend of what I am working on.

Tuesday, November 2, 2010

Week 11 - Design and Production - Responses to Your Work

Thinking about an Artist Statement again...

A. Are there any emotions you are trying to elicit? What are the formal qualities you would like people to recognize? What do you want them to say about your use of materials? Or subject matter? What would you really like for people to say about your art?

I try to elicit a sense of thinking, I think I want to create a sense of awareness about my work. I want it transcend "art" and make it more interesting as an object. The formal qualities I don't always go after, I feel like they fall into place without much thought, in the same point I think that formal qualities are ingrained in my process that I naturally make specific decisions about my work. I try to use new techniques and materials and hope to stay on the edge of technology and I try to keep my subject matter pretty current. I would really like people to not specifically talk about my work but, about the topic that the artwork is about. I like to cause discussion with my pieces.


B. I want to examine current social issues and issues that are not as apparent. I want to create work that has an interesting feel due to a deeper emotional ideal. I want to create artwork that makes people take a second look and not fully understand, I want them to question, to touch, to turn a piece in an attempt to find meaning. I want people to examine and analyze.

C. People tend to look at my work and turn it many directions. They tend to ask "what's that?" or to come up with their own definition of what it is. I enjoy this a lot. I tend to in person guide them by asking what they think of a certain part of aspect.

D.
      a. The subjects or style I choose are personal or in the moment because I feel that they are more interesting and culturally motivated.
       b. I am most inspired by things happening around me. I want to stay in the moment but, I also want to explore the past. I try to blend the two.
       c. I choose my materials because I am interested in what they can do. I like to experiment and see if I can take something farther then it currently is.
       d. I think viewers are most interested in my forms and shapes. They are not what they are normally used to seeing so it creates a dynamic response. It encourages them to twist and turn the models until they feel that they "know" what they are looking for.

Monday, October 25, 2010

Week 9 - Design and Production - Shapeways Arrives!

Just in time for tomorrow my stuff arrived from Shapeways today!


Week 8 - Jewelry 3 - After Action Review of Containment Project

I have to start off saying, this was a really rough project for me. I didn't expect it to become what it did. I forgot that it was something "for school" and it became this daunting, consuming task to create a proper memorial for my grandmother. As for my goals, looking at the final product, I couldn't be happier. When I see this, I can tell it is something she would have loved and it has this delicacy yet, rough impression that is really what I was going after.

In a more critical light, I feel that my craftsmanship needs work and I think some of this will come with more experience. I feel that I have not invested myself enough in metalsmithing to this point to really be able to produce the type of products I want to, I am not going to let this stop me though. I need to learn to solder better and learn to file better. Those were two parts that really held me back. I also had a lot of trouble with clasps and hinges and there is no excuse for not being able to get it done. I need more practice, but I also need to realize that everything isn't just going to come together every single time.

I made a lot of maquettes and I felt properly prepared that way, so I am not upset with the result. I think that I did not realize the need for a closing mechanism. I originally planned for the gut to completely contain the project and seal it off, but realistically it needs a closure.

I may not have had the "show piece" I wanted to create, but here is what I learned:

1. Filing is the most important part of a project. If you do not file it correctly it will not work.
2. Its not just this or not just that, don't time yourself - thank you Rachel, you don't know how much this helped me
3. Take your time.
4. It takes 5 times doing something perfectly to get it right, it probably won't go right
5. Keep everything clean and properly fluxed at all times or it will not flow, the soldering rules are for a reason
6. Practice makes perfect.

Week 8 - Jewelry 3 - Crowdsourcing

What is Crowdsourcing?
Crowd sourcing is a new trend surfacing all over the internet were companies actively seek out groups of people to run ideas by. It is a collective calling of ideas and reviews. Wikipedia defines crowdsourcing as, 


"Crowdsourcing is the act of outsourcing tasks, traditionally performed by an employee or contractor, to a large group of people or community (a crowd), through an open call." 


I think this is a very generic definition. Crowdsourcing makes your client/customer a part of the action. Crowdsourcing is a newer trend that developed roughly four years ago in Wired Magazine. Basically it said that electronics have become so cheap and easy to make that companies are taking advantage of releasing them into the market and waiting for the feedback they recieve on the the item before making changed or re-releasing the model. They are also taking the ideas from this feedback and putting it into the next year's model. 


Crowdsourcing layed dormant for a few years and exploded this year with major companies getting into the idea. Recently, the GAP released a logo without word to the public and waited for feedback from the populous. This was met with mix reactions. 


Crowdsourcing heavily relies on social media to make it spread and travel. It often employs tactics such as twitter feeds, facebook links and blogs to gain feedback from an informed audience that knows of their products. It also allows for a specific target audience to have insight gained from. 

Thursday, October 21, 2010

J3. Die Forming Crowdsource

I want to start out by saying this project was very emotional for me. I do not wish to give too much away for the entire concept because I feel that it will create a bias in some way as to the feedback I want to receive. So, in a quick summary of the project:

The project was to create a container using all the processes we have learned to this point and well as using a new technique of die-forming. For my subject matter, I decided to create a small box in which a note to a deceased relative would be encapsulated. This box was designed off of the different flowers and colors and senses I could remember from this person when I was a young child. Every part of the exterior of the die-form and the interior of the box that is to hold the note was carefully considered and planned for this person. The entire box was made for this person and this person alone. To create a sense of being private and internal the box is sealed in gut that binds it closed. The gut is fragile and can be easily ripped into. It is a representation of the thin barrier I put up to protect myself from the painful memories of loosing this individual. The gut also creates a barrier between the viewer and the piece protecting the note with very personal feelings from the outside world and the viewer.

The box will be shown below with the gut being ripped into, this is merely so that it can be viewed, also the gut takes off any patina that has been done unless it is sealed. I used a liver of sulfur patina making it hard to seal. If anyone has a suggestion of how it can be sealed without removing this patina I would very much like to find out so that the gut does not rip off the patina if it is ever removed for display purposes.

This is the piece in all the angles I captured. Thank you again for your time and comments can be left below or  emailed to pdobso1@students.towson.edu, if your coming from my facebook page, questions and comments may be asked there as well. Also, if you wish more detailed information you may visit the rest of my blog where you will find many posts detailing very aspect of this project and the process. Any questions you may have can be asked in the comment section below or again emailed to me directly.

Exterior with gut ripped for display. 

Quick Note: The gut here would be completely covering the back and the adhesive squares would be affixed to the covering gut allowing it to be placed anywhere on the body.

Close-up of Top and with detailing of bottom

Interior without Note

Interior Space with note inside. 

Showing it with one possible placement on the body. It is only meant to be worn when you want a physical memory of this person.